
A comprehensive Vancouver condo bathroom renovation checklist is the single most important tool you can prepare before touching a tile or calling a contractor. Renovating a bathroom in a Yaletown or Coal Harbour high-rise involves layers of approval, coordination, and technical planning that simply don’t exist in a detached house. This guide walks you through every step – from defining your scope and budget to the final walkthrough – so nothing gets missed.
This is a step-by-step, practical checklist built specifically for downtown Vancouver condo bathrooms. Whether you own a unit in Yaletown Park, The Pinnacle, Shaw Tower, or the Fairmont Pacific Rim Residences, the core process is the same: you need to navigate strata bylaws, City of Vancouver permits, building logistics, and construction sequencing – all while making smart design decisions for a small but important room.
The core checklist runs through six phases: (1) defining your scope and budget, (2) confirming strata rules and securing written strata approval, (3) obtaining city permits, (4) booking the right condo-savvy contractor, (5) planning building logistics like elevator bookings and debris removal, and (6) completing inspections and sign-off. Condo bathroom renovations in Vancouver typically cost $18,000 to $35,000 for a standard scope, with full gut renovations or luxury finishes pushing well beyond that range.
This article is written for vancouver condo owners living in concrete and glass towers who want to renovate confidently and compliantly. By the end, you will have:
A clear renovation planning sequence tailored to vancouver condo bathrooms
An understanding of strata approval versus City permits – and why you need both
A materials and fixture selection plan that avoids costly delays
A waterproofing and plumbing checklist that protects neighbours and your insurance
A printable quick-reference checklist you can use from day one
Understanding a Vancouver Condo Bathroom Renovation Checklist
A “renovation checklist” in this context is a structured sequence of decisions, documents, and tasks you complete before, during, and after renovating your condo bathroom. It is not a generic to-do list. It accounts for the specific regulatory, structural, and logistical realities of multi unit buildings in downtown Vancouver.
In a vancouver condo, your checklist must address strata bylaws, shared plumbing stacks, strict construction noise restrictions, elevator access, and the fact that water damage in your bathroom can cascade into units below. Skipping a step doesn’t just delay your project – it can result in fines, forced removal of completed work, or insurance liability that runs into tens of thousands of dollars.
Key Differences Between Condo and House Bathroom Renovation Checklists
When you renovate a bathroom in a detached house, you control the entire structure. In strata buildings, shared walls, a concrete slab, service risers, sprinkler systems, and shared building systems fundamentally change what is possible and what is permitted.
A condo bathroom renovation checklist includes items that a house renovation never would: a strata renovation application with detailed written scopes of work, a service elevator booking, a refundable damage deposit (typically $250–$500, though some buildings charge $1,500–$3,000 for larger scopes), water shutoff coordination with the building manager, and compliance with acoustic requirements. Common property boundaries often include plumbing stacks and shared exhaust vents in BC condos, meaning your work directly touches infrastructure that other owners depend on.
Most vancouver buildings – particularly downtown glass towers in Yaletown and Coal Harbour – require written approval even for what appears to be “simple” bathroom work. Renovations require approval from the strata council before any demolition or plumbing or electrical work begins.
Core Components of a Vancouver Condo Bathroom Checklist
Your complete checklist covers eight categories. Each one feeds into the next, and skipping ahead almost always creates problems:
Scope, measurements, and budget
Strata bylaws and approvals
City of Vancouver permits and inspections
Contractor selection and contracts
Building logistics (elevator, access, noise, debris)
Materials, fixtures, and lead times
Waterproofing, plumbing, electrical, and ventilation
Final inspections, documentation, and handover
The first item on your checklist is always clarifying what you plan to change and how much you can spend.
Step 1: Plan the Scope and Budget for Your Condo Bathroom
Before you contact your strata council or request contractor quotes, you need a clear picture of what you want to accomplish and what it will realistically cost. A well-defined scope makes every subsequent step faster – your strata application is more specific, your quotes are more accurate, and your contractor can plan efficiently.
Define Your Bathroom Renovation Scope
Start by deciding which category your project falls into:
Cosmetic bathroom refresh: New light fixtures, paint, mirror, and hardware. No plumbing or electrical changes. Budget-friendly but limited in impact.
Mid-range update: New vanity, wall tile and bathroom floor tile replacement, new shower doors, updated plumbing fixtures. May involve minor electrical upgrades.
Full gut renovation: Strip the bathroom back to studs, install new waterproofing, replace all finishes, and potentially modify the layout. This is the most disruptive and most expensive option.
Write a simple scope list that separates “must-haves” from “nice-to-haves.” Focus on daily use: Do you need more storage? Better lighting? A walk in shower instead of a tub? Accessibility features? If you are considering a freestanding tub, custom cabinetry, or custom vanities, note those as priorities that will affect budget and lead times.
Keep in mind specific constraints common in downtown towers: toilet locations are typically fixed in the concrete slab, and enlarging showers without affecting plumbing stacks can be difficult or impossible. Strata councils often prohibit relocating plumbing fixtures, and moving a toilet in a high-rise often requires core drilling – a process that is expensive, noisy, and subject to additional permits.
Measure Your Bathroom and Existing Layout
Measure the room carefully: length, width, ceiling height, and the exact locations of doors, windows (if any), the exhaust fan, and every existing fixture – toilet, tub or shower, and vanity. Record the distance from each fixture to the nearest wall and note where supply lines and drains enter the room.
Accurate measurements are essential in small Yaletown and Coal Harbour condo bathrooms, which often range from 35 to 55 square feet of floor space. A vanity that is two inches too wide or a glass enclosure that doesn’t clear the door swing can derail your entire tile layout and fixture plan.
Create a simple sketch with dimensions. This drawing will later go to designers, contractors, and your strata council as part of your renovation application.
Set a Realistic Vancouver Condo Bathroom Budget
Bathroom renovation cost in Vancouver runs higher than most owners expect. Costs in Metro Vancouver are 20% to 35% higher than the national average. Here are 2026 ballpark ranges for a standard downtown condo bathroom:
Cosmetic refresh: $8,000–$18,000
Standard full bathroom renovation (3-piece, existing layout): $18,000–$35,000
High-end or layout-changing renovation: $40,000–$65,000+
Full bathroom remodels in Vancouver can exceed $55,000 for extensive changes involving plumbing relocation, premium materials, or master bathroom expansions
Labour typically accounts for 40% to 50% of total renovation costs. The remainder covers demolition, plumbing fixtures, electrical work, tile installation and waterproofing, vanity and glass, permits, and strata renovation deposits.
A contingency fund of 10% to 20% is often recommended for condo renovations. Hidden costs frequently appear once walls are opened – concrete levelling issues, moisture damage behind old tile, or outdated galvanized or Poly-B piping that should be replaced while accessible. Condo renovations often require a 15-20% contingency for hidden costs like these.
Budget checklist:
Decide your total budget range (e.g., $25,000–$30,000)
List your spending priorities (e.g., invest more in waterproofing and shower systems, save money on accessories)
Set a separate allowance for fixtures and finishes
Include contingency (minimum 10–15%)
Decide Whether to Keep or Move Existing Plumbing Locations
This decision has the single biggest impact on your renovation cost, timeline, and permit requirements. In concrete construction typical of downtown high-rises, plumbing stacks and drain lines are often embedded in the concrete slab. Concrete slabs limit cutting and moving drains in condos, making plumbing relocation expensive and sometimes structurally inadvisable.
Keeping existing plumbing locations usually avoids structural concrete work, reduces the scope of plumbing permits, and simplifies strata approval. Modest changes – such as a tub-to-shower conversion in the same alcove – are generally feasible but still require City and strata review. High-rise renovations require adherence to BC Building Code standards regardless of scope.
On your sketch, mark what you hope to change and treat every proposed plumbing or fixture move as “tentative” until a qualified contractor confirms feasibility on site.
Step 2: Confirm Strata Bylaws and Renovation Approval
In a vancouver condo, strata rules can halt a project even if you have the budget and a willing contractor. Strata bylaw consultation is essential before making alterations that affect shared property. Requirements vary significantly by building – Yaletown glass towers often have stricter strata regulations than older low-rises – so never assume your building follows the same rules as a neighbour’s.
Locate and Review Your Strata Bylaws and Renovation Rules
Find your building’s bylaws and renovation forms through your welcome package, online owner portal, or property manager. Under the BC Strata Property Act, even the Standard Bylaws require written permission for alterations involving original plumbing and electrical fixtures or work that affects common property.
Key bylaw items to check:
Permitted work hours for noisy work (construction noise restrictions)
Requirements for contractor licensing, insurance (often $2–$5 million CGL), and WorkSafeBC coverage
Rules about plumbing or electrical changes, waterproofing standards, and access to mechanical rooms
Restrictions on moving fixtures, core drilling, or modifying the concrete slab
Specific acoustic and flooring specifications – impact insulation class ratings are often required for new hard surface flooring. Some buildings mandate acoustic underlayment meeting STC 66/IIC 67 for flooring
Whether older Vancouver buildings may need hazardous materials assessments before renovation can commence (common in pre-1990s towers)
Prepare a Strata Renovation Application Package
Most strata councils require a detailed renovation application. Strata alteration agreements usually require detailed written scopes of work submissions. The typical documentation most buildings request includes:
Written scope of work in plain language
Simple plan drawing showing existing and proposed bathroom layout
List of new plumbing fixtures and electrical fixtures (e.g., shower system, exhaust fan, heated floors)
Contractor details: business license, liability insurance meeting strata requirements, and WorkSafeBC number
Proposed schedule and daily work hours
Clarify whether your strata requires a signed alteration agreement or a refundable damage deposit before work starts. Condo renovations often require a refundable damage deposit of $250–$500, though some downtown buildings charge substantially more for larger scopes.
Strata Approval Timelines and Conditions
Strata council approval requires patience. Many councils meet monthly, so you should allow 4–6 weeks in your checklist before demolition – though renovation approval timelines can take 2 to 8 weeks depending on council meeting schedules and application completeness. Delays are common when applications are missing drawings, insurance documentation, or clear scope descriptions.
Approvals may come with conditions: mandatory waterproofing products, inspection photos at specific stages, or specific sound ratings for fans or flooring. Vancouver strata bylaws regulate renovation hours and material transport, and your approval letter will typically spell out these constraints.
Before moving forward:
Wait for written strata approval before booking demolition or scheduling material deliveries
Store email confirmations and signed forms – you will need these for future resale and insurance queries
Strata approval is mandatory for plumbing changes – do not proceed without it
Step 3: Check City of Vancouver Permits and Code Compliance
Strata approval and city permits are separate requirements. The City of Vancouver has specific guidelines distinguishing between cosmetic updates and structural changes. You may need one, both, or neither depending on your scope – but for any condo renovation involving plumbing or electrical work, you almost certainly need both.
Renovating a bathroom in a Vancouver condo requires compliance with municipal building codes. Permit rules can change, so confirm current requirements with the City or your licensed contractor.
When a Vancouver Condo Bathroom Needs a Plumbing or Electrical Permit
Permits are needed for relocating plumbing fixtures or altering electrical circuits in Vancouver. City permits are required for structural changes in condos.
Common plumbing permit triggers:
Relocating toilets, showers, or tubs
Adding a shower drain or converting a tub-only alcove to a walk in shower
Changing supply lines or tying into plumbing stacks in a new location
Plumbing fixtures must be CSA or ULC approved in BC
Common electrical permit triggers:
Adding new electrical circuits for heated floors, bidet toilets, or steam showers
Significant lighting changes, additional receptacles, or fan upgrades that alter wiring
Any electrical upgrades that affect panel capacity
Basic like-for-like fixture swaps – replacing a faucet with a similar faucet, or swapping light fixtures without changing wiring – may not require a building permit. However, always confirm with your contractor, as interpretations can vary.
Coordinating Municipal Permits With Strata Requirements
Some stratas require proof of City permits before construction can start or before authorizing water shutoffs. The typical order is:
Finalize scope and layout concept
Confirm with your contractor which permits are required
Apply for plumbing and electrical permits (the contractor often handles this)
Submit strata package including permit numbers or evidence of application
Track required City inspections (plumbing rough in, electrical rough-in, final) in your project calendar
Checklist: City vs Strata – Who Covers What?
City of Vancouver: Issues plumbing, electrical, and building safety permits. Conducts inspections to verify building code compliance. Enforces the Vancouver Building Bylaw.
Strata corporation: Controls noise hours, elevator bookings, debris routes, water shutoffs, contractor insurance requirements, and common-area protection. Enforces strata bylaws specific to your building.
Owner (you): Responsible for ensuring both City and strata approvals are in place before construction begins. You bear liability if work proceeds without proper authorization.
Step 4: Select and Hire a Condo‑Savvy Bathroom Contractor
A bathroom remodel contractor in North Vancouver or any vancouver contractor experienced with downtown high-rise condo bathroom projects will understand service elevator protocols, parking restrictions, security access, and how to work within tight noise windows. This experience matters more than you might expect – a contractor unfamiliar with strata buildings can burn through your contingency in delays alone.
Shortlisting Vancouver Condo Bathroom Contractors
Obtain at least 2–3 detailed written quotes that break out labour, materials, and allowances for fixtures separately. Generic lump-sum quotes make it difficult to compare value or understand where your money goes.
Ask each contractor specifically about recent projects in downtown high-rise buildings. Request references from condo projects – ideally in similar buildings. A contractor who knows your building manager and has worked with your strata’s property management company can reduce friction and delays considerably.
Familiarity with common downtown buildings and their specific strata rules is a genuine advantage for a successful condo renovation.
What to Check Before You Sign
Verification checklist:
Active business license in BC and appropriate trade tickets (especially for plumbing and electrical trades)
Liability insurance that meets or exceeds your strata’s requirements – minimum $2 million CGL is standard, with many buildings now requiring $5 million
WorkSafeBC coverage for all workers on site
Written scope of work, payment schedule, and change-order process
Clear statement of who handles strata communication, permits, inspections, debris removal, and protection of hallways and elevators
Confirm whether quoted timelines already account for restricted work hours and elevator booking limits. A timeline that assumes eight-hour workdays but doesn’t factor in a building’s 9 a.m.–5 p.m. weekday-only noise window will be inaccurate from day one.
Clarify Who Manages Paperwork and Coordination
Two common models exist:
Full-service contractor: Prepares strata packages, applies for City permits, schedules inspections, and coordinates with building staff
Owner-managed projects: You hire individual trades separately and handle all paperwork and logistics yourself
For most condo owners, choosing a full-service contractor who will help fill in strata forms, schedule City inspections, and coordinate water shutoffs and elevator bookings with building staff is worth the premium. Condo renovations typically require coordination with building management for elevator bookings and common area protection, and having a single point of accountability simplifies this significantly.
Step 5: Plan Building Logistics for Downtown Vancouver Condos
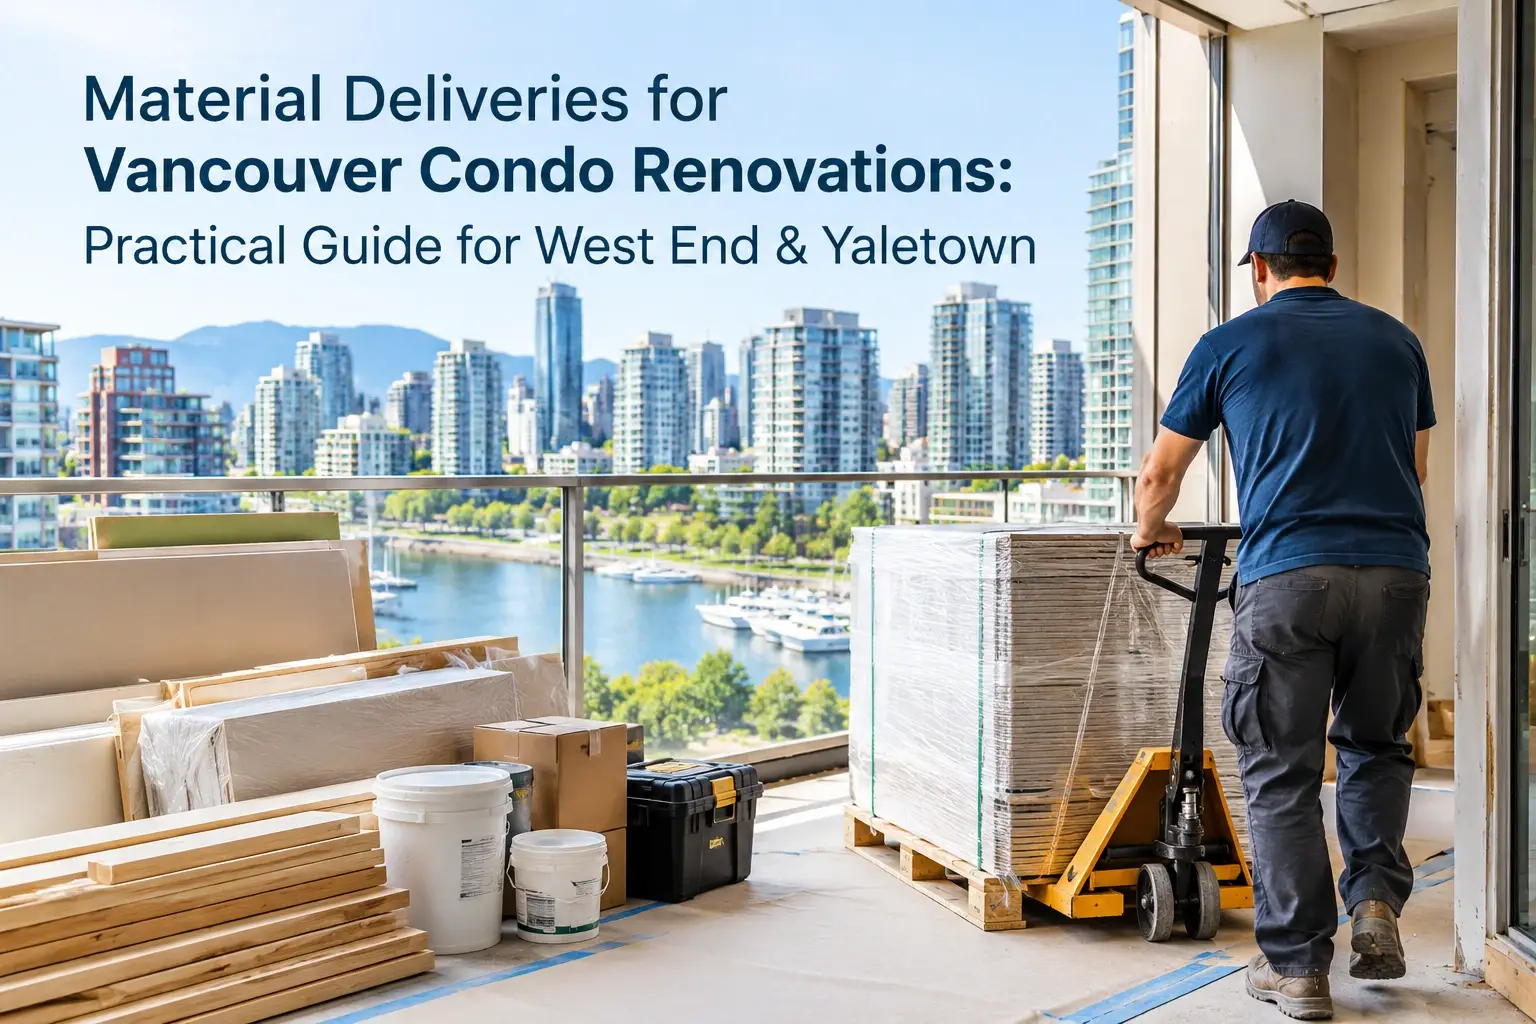
High-rise logistics in dense neighbourhoods like Yaletown and Coal Harbour can add days or weeks to your timeline if not planned early. Renovation logistics may require planning for noise restrictions and temporary bathroom access during construction – especially if you have only one bathroom.
Service Elevators, Loading Bays, and Parking
Elevator bookings are mandatory during renovations. Most buildings require you to reserve the service elevator in advance, often in half-day blocks.
Logistics checklist:
Confirm which elevator is designated for construction use and whether bookings are required
Ask about elevator padding requirements, key access, and any refundable damage deposits
Identify loading bay hours and vehicle height limits common in downtown parkades
Plan delivery times within strata rules and City street-parking limits
In buildings like those in Yaletown, building management often conducts pre- and post-inspection of elevators and hallways to assess any damage
Noise, Work Hours, and Neighbour Communication
Typical downtown work-hour windows run from 8 or 9 a.m. to 5 p.m. on weekdays, with occasional Saturday allowances depending on building-specific rules. These restrictions directly affect your construction schedule – a renovation that would take three weeks in an unrestricted setting may stretch to four or five calendar weeks.
Recommendations:
Confirm “no-noise” days or blackout dates (holidays, building events) with building management
Post polite notices to immediate neighbours about your start date, expected noisy days (demolition, drilling), and an emergency contact number
Verify whether your building distinguishes between general construction noise and high-impact work like core drilling
Debris Removal and Common‑Area Protection
Checklist:
Verify strata rules on debris staging locations, bin rentals, and approved hauling contractors
Plan how old tubs, glass, tub surrounds, and tile will be removed without damaging hallways or elevators – elevator access dimensions matter for large items
Ensure your contractor provides floor protection, door jamb guards, and corner protection for shared areas
Confirm daily cleanup expectations set by strata
Step 6: Choose Materials and Fixtures Early
Long lead times for tile, custom glass, custom vanities, and European fixtures into downtown Vancouver are a persistent reality in 2026. Ordering materials after strata approval but before demolition is the ideal sequence – it prevents idle time once construction begins while avoiding the risk of stockpiling items before you have authorization to proceed.
Core Materials for a Condo Bathroom
Tile: Floor tile, shower wall tile, and niche accents. Choose slip-resistant options for the shower floor and bathroom floor, and consider large-format tiles to reduce grout lines in small spaces. Tile installation quality matters as much as the tile itself.
Vanity cabinets and countertops: Size carefully for tight condo bathrooms. Floating vanities create a visual illusion of more space – a popular choice in compact vancouver condo bathrooms. Custom vanities require longer lead times.
Shower systems: Valves, handheld wands, rain heads. Confirm compatibility with your building’s water pressure. Curbless shower renovations in North Vancouver and walk in showers are a top trend for 2026, offering both accessibility and a modern aesthetic.
Toilets: Compact or skirted models save floor space. Integrated smart technology is becoming standard in condo bathrooms – wall-hung toilets and bidet seats are increasingly common.
Glass enclosures: Confirm that panel dimensions will fit through elevator access and hallway turns before ordering.
Warm earth-tone palettes are trending in modern bathroom designs, and biophilic design elements – natural materials, wood-look tile, plants – enhance the calming atmosphere of bathrooms.
Lighting, Electrical Fixtures, and Ventilation Equipment
Layered lighting: Combine ceiling fixtures, vanity sconces, and niche or accent lighting. Concrete ceiling constraints in high-rises may limit recessed lighting options.
Heated floors or heated towel bars: Verify that your electrical panel has capacity for these additions. Adding new electrical circuits requires permits.
Exhaust fan: Upgrade to a fan sized appropriately for your small condo bathroom. Look for low-sone ratings to minimize noise. Confirm the fan vents correctly into the building system, not into ceiling cavities.
GFCI outlets: Coordinate with the electrician for protected outlets near vanities and bidet toilets.
Manage Lead Times and Delivery Windows
Typical 2026 lead times for a vancouver bathroom renovation:
Standard plumbing fixtures and light fixtures: 1–3 weeks, while more complex full-scale shower renovations that address underlying leaks or damage can extend timelines
Custom glass and custom vanities: 4–8+ weeks
Imported tiles or specialty fixtures: 8–12 weeks potentially
Checklist:
Confirm all critical items are ordered before demolition day
Plan secure on-site or off-site storage in case deliveries arrive early
Align delivery days with elevator bookings – late deliveries with no elevator access create expensive downtime
Step 7: Waterproofing, Plumbing, Electrical, and Ventilation Essentials
In stacked condo buildings, water, moisture, and electrical safety affect multiple owners and multiple insurance policies. Waterproofing systems are crucial for preventing leaks that can affect units below. Proper waterproofing is critical due to the potential for water damage in shared residential spaces. This section provides a homeowner-friendly checklist for the technical work your trades will perform – you don’t need to do this work yourself, but you need to verify it gets done correctly.
Substrate Prep and Waterproofing Checklist
Waterproofing standards prevent leaks between condo units, and 2026 standards require superior membrane systems for waterproofing. Schluter Kerdi or equivalent sheet and liquid membrane systems are considered standard in quality vancouver condo renovations.
Homeowner checkpoints:
Confirm demolition exposes any damaged or mouldy substrates so they can be replaced before new waterproofing is applied
Ensure a continuous waterproofing system covers shower floor and walls, niches, curbs, and all plumbing penetrations
Verify the shower base is properly sloped to the shower drain before tile installation begins
Request photo documentation of waterproofing layers for your records and potential strata requests
Ask whether flood-testing (typically 24 hours) will be performed before tiling – reputable contractors include this step
Low-quality fixtures cause water damage in high-rises. Investing in thorough, inside-out bathroom renovation work with proper waterproofing and quality fixtures is not optional – it protects you, your neighbours, and your insurance coverage.
Plumbing and Drainage Considerations in High‑Rises
Condo bathrooms share plumbing stacks affecting multiple units, and specialized shower remodel services in North Vancouver often emphasize tying into these systems correctly. Tying into existing vertical stacks correctly is essential to avoid drainage problems and noise transmission to adjacent units. Plumbing systems in high-rises are interconnected – a mistake in your unit can affect everyone on your stack.
Pressure testing new plumbing lines before closing walls is critical. This confirms joints are secure and catches problems before they are buried behind tile.
Some buildings require licensed plumbers only, with inspection sign-offs at the plumbing rough in stage.
Checklist:
Confirm pipe types (copper, PEX) and assess condition in older towers – walls-open is the best time to address aging plumbing lines, much like thorough bathroom renovation projects in Burnaby that focus on upgrading older infrastructure
Discuss any recommended upgrades or replacements while access is available
Verify that all plumbing or electrical work meets the bc building code requirements your inspector will check
Electrical Safety and Ventilation Performance
Electrical checklist:
Verify all electrical work is performed by a licensed electrician with permits where required
Confirm GFCI protection for all outlets near water sources
Ensure any new loads – heated floors, bidet toilets, steam showers – fit within your unit’s panel capacity. Adding electrical circuits without adequate capacity is a code violation and a fire risk.
Ventilation checklist:
Specify fan CFM suitable for your bathroom size (typically 1 CFM per square foot minimum, more for enclosed showers)
Confirm the fan vents correctly into the building’s shared building systems exhaust, not into ceiling cavities or wall spaces
Test fan performance once installed – check noise level and airflow at the grille
Step 8: Construction Sequence, Inspections, and Final Walkthrough
A standard condo bathroom renovation takes four to eight weeks from demolition to completion. The typical construction sequence runs: demolition → substrate repair → plumbing and electrical rough-ins → inspections → waterproofing → tile installation → fixture installation → finishing → final inspections and sign-off.
Keep a simple timeline adjusted for your building’s noise rules and elevator bookings. Restricted work hours can stretch calendar time even when total labour hours remain the same.
Typical Downtown Vancouver Condo Bathroom Timeline
|
Phase |
Indicative Duration |
|---|---|
|
Planning, design, and approvals |
4–8+ weeks (including strata review) |
|
Material ordering and lead times |
2–8+ weeks (often overlapping with approvals) |
|
Active construction (standard scope) |
2–4 weeks |
|
Active construction (complex / layout changes) |
4–6+ weeks |
Strata approval can take 2 to 8 weeks depending on council meetings. Material lead times of 4–8+ weeks for custom items should overlap with the approval period whenever possible. Once construction begins, restricted work hours in most buildings mean a job that requires 15 working days may take 3–4 calendar weeks.
Inspections and Strata Checkpoints
Inspection checklist:
Confirm required City of Vancouver inspections: plumbing rough in, electrical rough-in, and final inspection
Ask your strata whether they require mid-project or final inspections, photo reports, or copies of passed inspection notices
Ensure any deficiencies flagged by inspectors are corrected before closing walls or completing finishes
Low-quality fixtures cause water damage in high-rises – inspectors will check that all plumbing fixtures meet code requirements
Final Walkthrough and Documentation
Conduct a thorough final walkthrough before making your last payment:
Test everything: Taps, shower mixing valve, toilet flush, exhaust fan, all light fixtures, GFCI outlets
Inspect finishes: Check tile and grout lines, silicone joints, and glass enclosures for defects or gaps
Verify drainage: Confirm proper slopes to drains and no standing water on the shower floor
Check access: Ensure all access panels for valves, fans, and shutoffs remain reachable
Collect and organize:
Invoices, warranties, and manuals for all fixtures and finishes
Copies of permits, passed inspection reports, and strata approvals
Photo records of work behind walls – plumbing, waterproofing, and electrical – for future reference and insurance documentation
Common Vancouver Condo Bathroom Renovation Pitfalls and How to Avoid Them
These recurring problems turn into expensive lessons. Treat them as red flags on your checklist.
Skipping Strata and Permit Steps
The risks are real: fines from your strata corporation, orders to remove completed work, voided insurance coverage, and complications at resale when buyers’ lawyers discover unpermitted work.
Never start demolition before written strata approval and any required City permits are in hand
Confirm in writing with your contractor who is responsible for permits and inspection scheduling
Keep all official correspondence in a dedicated folder or cloud drive
Most Vancouver condos require written strata approval for renovations – there are no shortcuts
Underestimating Building Logistics
Elevator failures, limited loading hours, building events, or another unit’s renovation competing for the same elevator can delay your work unexpectedly.
Book elevators as soon as dates are confirmed and reconfirm a week before work starts
Have backup dates in case of elevator or loading bay conflicts
Plan small, frequent deliveries rather than one massive load when storage space is limited
Confirm procedures directly with your building manager – don’t rely on your contractor’s assumptions about how your specific building operates
Leaving Materials and Design Decisions Too Late
Late tile or vanity selections are the most common cause of schedule gaps and change orders in condo bathroom projects. When your contractor is ready to install and your tile hasn’t arrived, you pay for idle time.
Lock in main finishes – tile, vanity, countertops, plumbing fixtures – before the strata package is submitted where possible
Choose in-stock or quick-ship items when timing is tight
Build a small spare stock of tiles (roughly 10% extra) for future repairs
Confirm that all ordered materials will arrive before demolition day
Conclusion and Next Steps
A successful condo renovation in downtown Vancouver depends on following a structured checklist that balances your design goals with strata, City, and building constraints. The process requires more patience and paperwork than a house renovation – but when each step is completed in order, the result is a high rise bathroom that is compliant, well-built, and adds lasting value to your strata unit.
Your immediate next steps:
Measure your existing bathroom this week and write a simple scope list with “must-haves” and “nice-to-haves”
Request your strata’s most recent bylaws and renovation rules from your property manager
Contact 2–3 condo-experienced vancouver bathroom renovation contractors for preliminary conversations
Start a digital folder for approvals, permits, quotes, and product specs
Draft your personalized Vancouver condo bathroom renovation checklist using the headings from this article
If you are planning a broader home renovation using a detailed checklist in vancouver – a kitchen under the same strata rules, or broader condo renovation work across multiple rooms – many of the strata approval and logistics steps outlined here apply equally. Start with the bathroom, refine your process, and carry those lessons forward.
Vancouver Condo Bathroom Renovation Checklist: Quick Reference
This condensed checklist mirrors the detailed sections above. Print it, copy it into a notes app, or share it with your contractor.
Planning:
Measure room and draw a simple plan with all fixture locations
Define scope: cosmetic bathroom refresh / mid-range update / full gut renovation
Set budget and contingency (minimum 10–15%)
Decide whether existing plumbing locations will stay or move (subject to feasibility confirmation)
Strata:
Obtain strata bylaws and renovation policies from property management
Prepare application with scope description, drawings, and contractor info
Confirm deposits, permitted work hours, and elevator rules
Wait for written strata approval before proceeding
Permits:
Ask your contractor which City permits are needed for your scope
Apply for plumbing and/or electrical permits if required
Note required City inspection stages in your project calendar
Contractor:
Shortlist condo-savvy firms with downtown high-rise experience
Check licensing, insurance (minimum $2M CGL), and WorkSafeBC
Clarify who manages permits, strata paperwork, and logistics coordination
Logistics:
Book service elevator and loading bay access
Plan debris removal and common-area protection
Confirm work hours, blackout dates, and neighbour notices
Materials:
Select tile, plumbing fixtures, vanity, lighting, and exhaust fan
Confirm lead times and arrange storage for early deliveries
Align delivery dates with elevator bookings
Construction:
Demolition and substrate repair
Plumbing and electrical rough-ins
Waterproofing, tile installation, and finishes
City and strata inspections as required
Final walkthrough, testing, and documentation
Using this checklist keeps your Yaletown or Coal Harbour bathroom renovation organized, compliant, and on schedule.